Cooler Bag Shoulder Straps: Comfort & Strength Design
Discover how to run a custom cooler bag oem program for North America: materials, tech pack, sampling, QC and shipping. Get OEM/ODM-ready checklists and quote
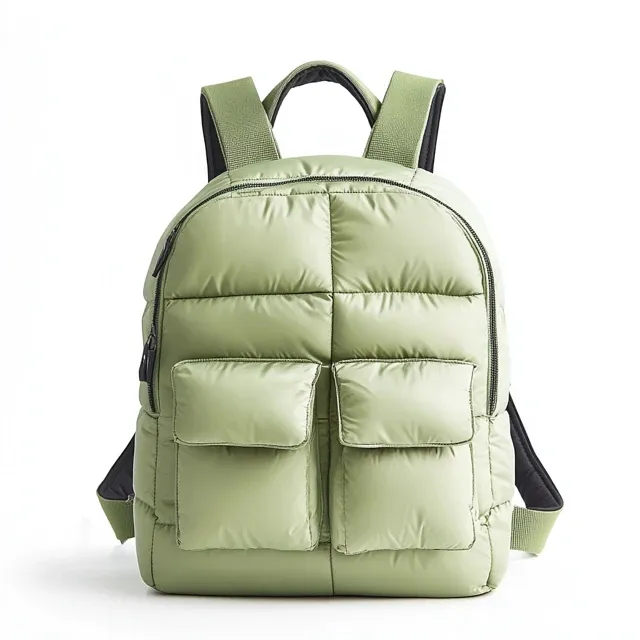

How a Cooler Bag Actually Gets Made, Step by Step
If you are targeting North America with a value positioning, the key is to prevent variance: materials, trims, workmanship and packout rules must be written and checked.
What the production team controls (process, not hype)
Rather than restate a long matrix, this section points to importing from China, where each row carries its method and acceptance value.
A useful visit audits control points; it should never feel like a showroom tour.
Workflow on the production floor: step by step
- RFQ alignment: confirm claim scope, target cost, and packout rules before sampling.
- By spec, material sourcing locks the coating/laminate spec, fabric route and trim vendors.
- Pattern & measurement control: create templates, tolerance map, and reinforcement plan.
- Keep shade lots in order; verify marker efficiency and grain direction when cutting.
- Critical-zone reinforcement, then seam allowance and stitch spec, enforced at sewing or welding.
- Use placement jigs during final assembly to install hardware, logos and accessories.
- Inspection & packing: apply AQL sampling, carton marking, and shipping documents.
Typical buyer use scenarios
- picnics
- camping
- food delivery
- beverage brands
- promotions
Key functions buyers request most
- thermal insulation
- leak-proof construction
- food-grade lining
- reinforced handles
- smooth zippers
Choosing the Best Materials for Custom Cooler Bags
| Material | Performance | Cost Range | Preferred For | Upsides & Limitations | Risks & How to Control |
|---|---|---|---|---|---|
| 600D polyester | Balanced wear resistance (ISO 13934 tensile to spec); good scuff resistance (ISO 12947 to spec); stable for branding | US$1.6–5.5 / meter (per the specification) | Running styles with predictable yield | Upsides: versatile. Watch-outs: performance depends on coating/finish | Lock coating spec, color tolerance and print compatibility; confirm reinforcement mapping |
| PU coated polyester (600D, per the specification) | Good repellency (ISO 4920 / AATCC 22 per spec); moderate barrier (ISO 811 per spec) | US$1.2–6.0 / meter (per the specification) | Value/core lines where print clarity matters | Upsides: cost controlled. Trade-offs: coating wear over time | Define spray rating targets and abrasion resistance benchmarks; protect high-wear zones |
| Canvas / cotton (as specified) | Good hand-feel and print; waterproofing depends on finish (AATCC 22 per the specification) | US$1.0–3.5 / meter (as specified) | Retail lifestyle lines, totes and promotions | Advantages: classic look. Limitations: heavier; stain risk without finish | Define shrinkage and colorfastness tests (AATCC 61 / ISO 105 to spec); specify lamination if needed |
How to shortlist materials fast
- Start from the scenario: abrasion zones, load points, and water exposure define the route.
- Main compartment only is one option; decide if the claim spans the whole bag or zones.
- Cite the ISO, AATCC or ASTM references in your pack and state what passes.
- Pick trims that suit the chosen route: zipper type, sliders, buckles and webbing strength.
- Print and branding compatibility is confirmed on the real fabric.
- Evaluate transit rubbing risk, because visible creases are freight damage far more often than stitching faults.
Custom Design & Development Process
What to include in a buyer-ready tech pack
- Bill of input materials (BOM): fabric route, coating/laminate, lining, foam, webbing, thread, binding, trims
- Measurement table: critical dimensions and tolerances by zone
- Construction notes: stitch type, stitch density, seam allowance, reinforcement mapping
- Branding method: print/embroidery/patch method, backing, and acceptance examples
- Packaging spec: insert, polybag, carton count, carton marking, barcode placement
- Revision control: version number, change log, and approval record
OEM/ODM development flow (practical)
- Define target user, price band and positioning.
- Lock claim scope, then confirm the test plan to spec.
- To build it, add the BOM, then the measurement table, then the tolerance map, then artwork placement.
- Prototype sampling validates fit, structure and the material route.
- By PP, BOM and packaging route are final.
- First, sign the QC checklists and golden sample; only then cut bulk.
Sampling checklist (avoid costly mistakes)
- Confirm fabric shade and coating feel with the actual supplier lot (per spec).
- The mark's location gets a template check against the actual print method first.
- Testing to spec means stressing the webbing, the handles and each D-ring junction.
- Sign off cycles per spec only after zipper path and slider feel are checked.
- Run the open/close and pack cycle many times: corner wear and seam creep are what to watch.
- Assessment pack resistance to abrasion resistance, folding, and dampness before trusting it on the lane.
- Changes stop at freezing, so bulk cutting runs without late feature creep.
What shortens the sampling loop
Condensed here by design — the extended comparison belongs to cost structure and minimum order quantity, alongside the rest of the reference data.
Repeatability beats one-off samples
Success example (anonymized): a value program targeting North America reduced rework by freezing a single tech pack, running one pre-production sample using the final BOM, and aligning QC checkpoints before cutting. Reproducible builds remove the annual need to qualify someone new when reordering.
Production & Manufacturing Methods for Cooler Bags
Ordering choices get clearer once you compare lead time, MOQ requirements and cost bands in the table.
| Production Type | Lead Time | MOQ | Cost Level | Best For |
|---|---|---|---|---|
| ODM catalog customization | 6-10 working days + 35-50 days | low–medium (by spec) | low–medium | Fast launches and proven silhouettes |
| Small-batch pilot run | 6-10 working days + 35-50 days | 500 pcs | medium | Startups, corporate gifting, SKU validation |
| Standard OEM mass production | 35-50 days | medium–high (by spec) | optimized | Retail replenishment and stable demand |
| Expedited production program | 15–25 days (by spec) | by program | higher | Time-critical launches |
| New tooling / new materials route | sampling + production by spec | by spec | premium | New silhouettes and claim-led innovation |
Manufacturing methods you should specify (by spec)
Rather than restate a long matrix, this section points to tote bag specifications, where each row carries its method and acceptance value.
Custom Branding, Logo & Final Assembly
Logo methods we can support (select 1–2 per SKU)
The full row-by-row breakdown lives on quality control and certification; this piece keeps the focus on how those figures change the decision you actually have to make.
Final assembly controls that prevent returns
- Thread trimming and burn control (no loose ends, no scorch marks)
- Zipper end reinforcement and smoothness check
- Visual check for wrinkles, creases, and surface scuffs before packing
Shipping, Logistics & Order Fulfillment
Logistics execution gates
Rather than restate a long matrix, this section points to handbag specifications, where each row carries its method and acceptance value.
Key Factors to Choose a Reliable Cooler Bags Manufacturer
Use this checklist before signing an OEM/ODM contract for cooler bags.
Manufacturer selection checklist
- Can they quote from a tech pack and explain assumptions?
- Can they source the BOM and also suggest alternatives that meet spec?
- Is there an AQL plan, and do QC checkpoints cover IQC through IPQC into FQC?
- Can workmanship survive a flexible MOQ arrangement?
- Can you expect firm lead times and a clear escalation procedure?
- Does their track record include packaging and shipping into your market?
Site audit checklist (what to check in person)
Numbers age badly when copied into dozens of places, so the maintained version of this grid stays on the full manufacturing workflow.
Capability summary
Numbers age badly when copied into dozens of places, so the maintained version of this grid stays on own-brand programmes.
Load Paths, Webbing Specs and Padding Geometry for Cooler Straps
A loaded cooler behaves unlike any other soft bag: the contents are dense, the weight does not shift, and one shoulder carries the whole load. A 24-can cooler filled with beverage and ice reaches 9 kg to 12 kg before the wearer takes a step. That figure drives every downstream decision, from webbing width to foam density. QUANZHOU JUNYUAN BAGS starts strap engineering from the rated payload rather than from the shell fabric, because a good-looking cooler that digs into the shoulder comes back as a return.
Webbing is the primary load path. Woven polyester webbing at 25 mm works for single-meal lunch coolers under 4 kg; 38 mm suits 20-can to 30-can formats in the 6 kg to 10 kg band; 50 mm is specified once payload exceeds 10 kg or when the strap doubles as a haul handle. Tensile performance is verified by ASTM D5034 grab testing and abrasion resistance by ASTM D3884, so two suppliers quoting the same width can be compared on data instead of on samples that merely look alike.
Padding converts point load into distributed pressure. Closed-cell EPE sheet at 8 mm recovers slowly after compression, while moulded EVA at 12 mm recovers faster and holds its shape through a full season. Widening the pad from 60 mm to 90 mm on a 10 kg cooler cuts contact pressure from roughly 0.19 kg per square centimetre to 0.13 kg per square centimetre, a change the wearer notices far more than any cosmetic detail on the shell.
| Cooler capacity | Loaded weight | Webbing | Pad build |
|---|---|---|---|
| 6 to 9 can | 3 kg to 4 kg | 25 mm polyester | EPE 8 mm, 60 mm wide |
| 18 to 24 can | 7 kg to 10 kg | 38 mm polyester | EVA 10 mm, 75 mm wide |
| 30 to 48 can | 11 kg to 16 kg | 50 mm polyester | EVA 12 mm, 90 mm wide |
Attachment is where low-cost coolers fail. A bar-tack or box-X pattern across a minimum 40 mm footprint, sewn with bonded polyester thread at 8 to 10 stitches per inch, spreads the pull into the body panel rather than into one seam line. Adding a hidden reinforcement plate behind the webbing tail raises pull-out resistance substantially without changing the silhouette. Hardware matters equally: POM tri-glide sliders run quiet and light, zinc-alloy cam buckles carry heavier loads, and both are corrosion-checked to ASTM B117 before approval.
Validation costs little next to a recall. Our production team runs a static hold at three times the rated payload for five minutes, a 1,000-cycle strap adjustment fatigue check, and seam strength testing under ASTM D751 on the strap-to-body joint. Every bulk order is inspected to AQL 2.5 with Critical defects set at zero, and strap separation is classed critical rather than major because it makes the product unusable and unsafe at the same time.
Buyers planning a family-size cooler usually work on strap geometry and capacity together, so the companion article on cooler bag sizing from personal to family formats is worth reading alongside this one. Shell and lining selection is covered under custom bag materials. Prototypes with a revised strap assembly are produced in 6 to 10 working days at MOQ 500, with tooling for custom buckles quoted at USD 300 to 2,500.
Frequently Asked Questions (FAQs)
What webbing width should a 24-can cooler bag use to stay comfortable under a full load?
A 24-can cooler reaches 7 kg to 10 kg once iced, so 38 mm woven polyester webbing over a 10 mm EVA pad is the standard build. Below 5 kg, 25 mm webbing is sufficient; above 11 kg we move to 50 mm and widen the contact pad to 90 mm.
How is strap attachment strength verified before a cooler bag order is released?
Strap joints are static-load tested at three times rated payload for five minutes, then seam strength is measured under ASTM D751. Bulk inspections follow AQL 2.5 per ISO 2859-1, with strap separation classified as critical at zero tolerance.
Which padding material keeps its thickness after a season of compression cycling?
Moulded EVA at 12 mm recovers faster than 8 mm EPE sheet and resists permanent set. We cycle pads 1,000 times under a 10 kg load and reject any sample that loses more than 15 percent of its original thickness.
Can a branded cam buckle or tri-glide slider be specified on cooler bag straps?
Yes. Custom buckles need tooling at USD 300 to 2,500 depending on cavity count and logo depth. POM sliders suit light loads, while zinc-alloy cam buckles suit payloads above 10 kg and are salt-spray checked to ASTM B117 before approval.
What stitch pattern stops webbing pull-out at the cooler bag stress point?
A bar-tack or box-X pattern over a minimum 40 mm footprint, sewn with bonded polyester thread at 8 to 10 stitches per inch and backed by a hidden reinforcement plate. This spreads the pull into the body panel rather than into a single seam line.
How much does a removable padded strap pad add to the cooler bag unit price?
A detachable EVA pad with hook-and-loop closure typically adds USD 0.60 to 1.40 per unit at MOQ 500, depending on foam thickness and cover fabric. It is quoted separately from the shell so budget lines can drop it without re-patterning.
Do metal strap components resist corrosion in coastal or marine use?
Zinc-alloy hardware is finished and salt-spray tested under ASTM B117 for 24 to 48 hours. For marine programmes we recommend POM or stainless fittings instead, because chloride exposure shortens plated finishes regardless of coating thickness.
How long does a revised strap assembly take to sample at MOQ 500?
A revised strap assembly samples in 6 to 10 working days; complex builds with custom buckles or moulded pads take 12 to 15. Sample charges run USD 50 to 150 and are credited against the bulk order once production is released.
Related Blog Posts & Useful Resources
Internal resources
- Browse products & categories
- Factory capabilities & process
- Download QC checklist
- Retail packing specification guide
Related blog posts
- Cooler Bag Trends 2026: Lightweight & Stylish
- Custom Backpack Materials: Nylon, Polyester & RPET Compared
- Cooler Bag MOQs: Small-Batch vs. Mass Production
- Cooler Bag Size Guide: From Personal to Family-Size
- Cooler Bag Insulation Thickness: What Works Best?
- Cooler Bag Materials: PEVA, EPE Foam & Aluminum Foil Explained
Next step
• Lock keyword and claim scope for custom cooler bag oem
• Build a tech pack with BOM + tolerance map
• Choose materials route and validate tests (by spec)
• Plan sampling gates (lead time 6-10 working days)
• Set MOQ and cost targets (MOQ 500 pcs)
• Define QC plan and AQL checkpoints
• Confirm production + shipping timeline (35-50 days)

Want help with your next bag project?
Your requirements go in; a structured RFQ checklist and manufacturing plan come out.
Linked programme guides: custom backpacks.
Comfort Is Load Distribution, Not Padding Thickness
Discomfort is pressure, and pressure is load divided by contact area. A fully loaded 24-can cooler weighs 8–12 kg, and on a 25 mm strap that load concentrates into a narrow band that cuts into the trapezius within twenty minutes. Widening the strap to 45–50 mm roughly halves the contact pressure before any padding is added, which is why width is the first lever and foam thickness is the second. Padding does its real work differently: it stops the strap edge from digging and it keeps the webbing from rolling, but beyond about 10–12 mm of EPE it adds bulk without spreading load much further.
Material choice inside the strap matters more than the number of millimetres. EPE in the 22–25 kg/m³ range holds its thickness under a realistic load; softer foam feels plush in the showroom and flattens on the first outing, after which the strap feels the same as an unpadded one. A spacer-mesh or air-mesh underside moves sweat away from the shoulder, which is the difference between a comfortable bag and a wet shirt on a hot day, and a silicone-grip strip on the underside stops the strap sliding off a sloping shoulder when the bag is carried on one side.
| Component | Specification | Verification | Why it matters |
|---|---|---|---|
| Webbing | 38–50 mm polyester, flat weave | ASTM D5035 strip, break over 1,000 N at 25 mm | Width sets contact pressure, weave sets roll resistance |
| Padding | 8–12 mm EPE, 22–25 kg/m³ | Compression set check after 24 hours loaded | Soft foam flattens permanently in one season |
| Underside facing | Spacer mesh or air mesh | Visual and hand check on the golden sample | Manages sweat on warm-weather use |
| Anchor | Bar-tack plus internal reinforcement patch | Static pull to three times rated load | The anchor is the highest-stress stitch on the bag |
| Adjuster | Cam buckle or ladderlock, branded where possible | Slip test at maximum load, 500 open-close cycles | Slip shows up as a strap that re-tightens itself |
| Grip treatment | Silicone print or textured weave | Slide test on a sloping shoulder form | Stops the bag sliding when carried cross-body |
Strength Is Decided Where the Load Leaves the Bag
Straps almost never fail in the middle. They fail at the anchor, at the adjuster, or where the webbing passes through a binding and is stitched through its own padding. The anchor is the highest-stress point on the entire cooler, because it carries the full load plus the dynamic shock of walking, and it concentrates that load into a few centimetres of shell fabric. The control is unglamorous and effective: fold the webbing end, add an internal reinforcement patch, and bar-tack through both rather than running a straight stitch down the strap.
Stitching through padding is the second classic error. When the needle penetrates the foam, the thread compresses it locally and the foam migrates away from the stitch line under load, leaving a visible channel and a loose attachment. Bind the padding to the webbing separately, or stitch the assembly through a webbing channel rather than through the foam. On welded-liner builds, keep the anchor out of the weld land entirely; a bar-tack through a weld is a leak path into the insulation.
Adjusters are a specification risk that hides in plain sight. A cam buckle that slips under load is not a broken part, it is an undersized one, and it is why the slip test belongs on the first article rather than in the field. Branded hardware from suppliers such as Duraflex holds dimensional tolerance across lots, which means a replacement buckle from a later order fits the same webbing; unbranded hardware frequently does not, and the symptom appears as intermittent slip that no incoming inspection will reliably catch.
Cost is modest relative to the perceived value. Widening a strap from 25 mm to 45 mm adds cents in webbing; going to a branded adjuster adds more; adding a moulded shoulder pad is the only strap decision that carries tooling, and that sits in the USD 300–2,500 band depending on how bespoke the shape is. Given that strap comfort is the first thing a reviewer writes about and the first thing a customer complains about, it is the highest-return specification line on a cooler bag.
Specify the strap and the shell together, because the anchor loads whatever fabric it is sewn to; see material selection for load-bearing builds, and where the cooler is worn as a pack, align the strap geometry with the compartment layout of a cooler backpack so the load sits close to the spine.