Cooler Backpacks With Multiple Compartments: Design Tips
Discover how to run a custom cooler backpack oem program for United States: materials, tech pack, sampling, QC and shipping. Get OEM/ODM-ready checklists and
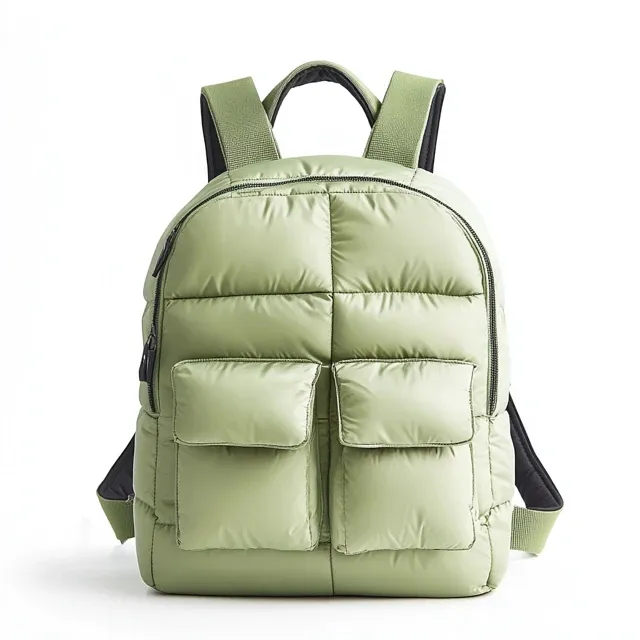

Inside the Build: How a Cooler Backpack Goes From Pack to Carton
A professional cooler backpack program is a controlled workflow: clarify requirements, lock the build route, validate with measurable gates, then scale production with repeatable QC.
If you are targeting United States with a value positioning, the key is to prevent variance: materials, trims, workmanship and packout rules must be written and checked.
Primary SEO focus: custom cooler backpack oem. Secondary: cooler backpack manufacturer, private label bags, custom logo bags, OEM ODM bags.
Control points the build is measured against
Rather than restate a long matrix, this section points to the full manufacturing workflow, where each row carries its method and acceptance value.
Any tour worth taking is a control-point checklist in disguise, not a showroom trip.
Stage-by-stage: how the order is worked
- Brief alignment: settle the claim scope, cost target and packing rules before any sample.
- Within material sourcing, lock by spec: coating/laminate spec, fabric route, trim vendors.
- Pattern control: build templates, set a tolerance map, plan the reinforcement.
- Cutting stage: check grain direction plus marker efficiency; hold shade lots steady.
- Sewing and welding: hold the line on stitch spec, seam allowance, critical-zone reinforcement.
- At the final assembly stage, placement jigs position logos, hardware and accessories.
- Close with inspection: AQL sampling, carton marks and the export paperwork.
Typical buyer use scenarios
- picnics
- camping
- food delivery
- beverage brands
- promotions
Key functions buyers request most
- thermal insulation
- leak-proof construction
- food-grade lining
- reinforced handles
- smooth zippers
Choosing the Best Materials for Custom Cooler Backpacks
| Material | Performance | Cost Range | Leading For | Merits & Trade-offs | Risks & How to Control |
|---|---|---|---|---|---|
| PU coated polyester (600D, to spec) | Good repellency (ISO 4920 / AATCC 22 per spec); moderate barrier (ISO 811 as specified) | US$1.2–6.0 / meter (to spec) | Value/core lines where print clarity matters | Upsides: cost controlled. Trade-offs: coating wear over time | Define spray rating targets and scuff resistance benchmarks; protect high-wear zones |
| Recycled RPET (route, per the specification) | Sustainability positioning; performance depends on coating/laminate (ISO 4920 / ISO 811 per spec) | US$1.5–3.8 / meter (per spec) | Eco positioning programs and corporate procurement | Upsides: sustainability narrative. Limitations: supply stability and lot drift risks | Lock supplier lots, traceability and color delta; validate print and coating compatibility |
| Canvas / cotton (as specified) | Good hand-feel and print; waterproofing depends on finish (AATCC 22 as specified) | US$1.0–3.5 / meter (per spec) | Retail lifestyle lines, totes and promotions | Upsides: classic look. Watch-outs: heavier; stain risk without finish | Define shrinkage and colorfastness tests (AATCC 61 / ISO 105 to spec); specify lamination if needed |
Narrowing the material route quickly
- Work back from use: where it rubs, where it carries load, and how wet it gets set the route.
- Decide whether the claim covers the whole bag or only zones like the main compartment.
- Every referenced ISO/AATCC/ASTM procedure should be listed, together with the numeric bar for approval.
- Choose route-suitable trims, from zipper type and sliders to buckles and webbing strength.
- Confirm that print and branding suit the specified fabric.
- Scuffing and creasing usually trace to transit, not to stitching defects.
Design and Development: How the Build Is Specified
Tech pack contents that get a fast quote
A consolidated table would duplicate itself across every article on this topic, so ours sits on importing from China and gets the updates.
The development sequence, as it really runs
- Pin down who buys it, at what retail band, and where it sits.
- Confirm the claim scope and its test plan by spec.
- Artwork placement, tolerance map, measurement table and BOM: four pieces that make the tech pack.
- Fit, structure and material route get validated at prototype sampling.
- Final BOM, final packaging route: the PP stage.
- Sign-off requirement: QC checklists plus the reference sample, ahead of bulk cutting.
Sample-stage checks that prevent expensive rework
- Review artwork location physically on paper before the selected print process runs.
- Verify the zipper path, then slider feel, then the cycle requirement per spec.
- Open, close and repack the product many times, watching for corner wear and seam creep.
- One PP sample, built with the final BOM and final packing route, is what needs approval.
- Lock all changes before bulk cutting; avoid late feature creep.
Fewer sample rounds: what actually helps
For the complete spec grid — including the acceptance criteria and lot sizes — read handbag specifications.
Why a repeatable build outperforms a hero sample
Success example (anonymized): a value program targeting United States reduced rework by freezing a single tech pack, running one pre-production sample using the final BOM, and aligning QC checkpoints before cutting. A construction that can be duplicated means each season's reorder goes to the same partner.
Production & Manufacturing Methods for Cooler Backpacks
Weigh MOQ requirements against turnaround duration and price tier using the options table.
| Production Type | Lead Time | MOQ | Cost Level | Best For |
|---|---|---|---|---|
| ODM catalog customization | 6-10 working days + 35-50 days | low–medium (by spec) | low–medium | Fast launches and proven silhouettes |
| Small-batch pilot run | 6-10 working days + 35-50 days | 500 pcs | medium | Startups, corporate gifting, SKU validation |
| Standard OEM mass production | 35-50 days | medium–high (by spec) | optimized | Retail replenishment and stable demand |
| Expedited production program | 15–25 days (by spec) | by program | higher | Time-critical launches |
| New tooling / new materials route | sampling + production by spec | by spec | premium | New silhouettes and claim-led innovation |
Build methods worth naming in the pack
The full row-by-row breakdown lives on the full manufacturing workflow; this piece keeps the focus on how those figures change the decision you actually have to make.
Branding and Final Assembly
Decoration routes available (pick one or two per SKU)
A consolidated table would duplicate itself across every article on this topic, so ours sits on importing from China and gets the updates.
Closing-stage checks that cut return rates
- Thread trimming and burn control (no loose ends, no scorch marks)
- Trims and hardware function check: buckles, sliders, and snaps
- Zipper end reinforcement and smoothness check
- Visual check for wrinkles, creases, and surface scuffs before packing
Freight, Documents and Delivery
Checkpoints on the shipping leg
Reference figures for this stage are maintained centrally: see tote bag specifications for the current values and how they were derived.
Key Factors to Choose a Reliable Cooler Backpacks Manufacturer
Use this checklist before signing an OEM/ODM contract for cooler backpacks.
Partner selection checklist
- Will they price off your pack and show what they assumed?
- Are alternatives by spec offered, and BOM sourcing controlled by them?
- Do they evidence QC checkpoints, IQC to IPQC to FQC, and an AQL plan?
- Without hurting workmanship, can they allow a flexible MOQ?
- Can they give firm lead time commitments and a defined escalation path?
- Do they bring packaging and shipping know-how that fits your market?
What to verify when you walk the production site
- Incoming material inspection records and traceability by lot
- Needle control and metal detection process (if required to spec)
- Inline QC stations and sampling frequency
- Measurement tools calibration and template storage
- Packing area: carton marking, barcode process, and SKU separation
- Corrective action loop: how issues are documented and closed
Where this build route is strongest
- Sustainable options: RPET, recycled nylon, eco-friendly fabrics
- Multi-stage QC system: incoming material → inline → pre-shipment
- Strong at structured bags: stand bags, hard-base bags, specialized tooling
Zoning a Cooler Backpack So Cold, Dry and Wet Loads Stay Separate
A cooler backpack fails when one compartment is asked to do three jobs. The workable layout separates the insulated, leak-prone volume from the dry volume and from anything wet that needs to drain, then gives each of them an access path that does not disturb the others. Five zones is the practical ceiling before the pack becomes a set of small unusable pockets.
The insulated compartment sits low and carries most of the weight, typically 12 to 18 litres on a 30 litre pack. It needs a radio-frequency welded liner rather than a stitched one, because needle holes at the floor corners are where leaks start, and a drain plug at the lowest point so melt water can be released without inverting the pack. A covered storm flap over the zipper keeps the closure out of the direct thermal path.
The dry compartment belongs above or in front of the insulated one and holds food, clothing and electronics. It must be isolated by a full barrier layer, not just a fabric divider, since condensation forms on the outside of a cold liner and will wet anything touching it. A 6 to 10 litre dry volume is enough for a day out, and a vapour barrier of 0.10 mm to 0.15 mm film inside the divider does the work.
Side and front zones handle the rest: stretch mesh pockets for bottles, a zippered front organiser for utensils and a small dry pocket for keys and phone. Bottle pockets are sized generously, since a pocket that is tight on a 1 litre bottle eventually tears at the binding. External attachment points are better placed on the front face than the sides, where they foul the swing of the arms.
Load Path and Centre of Gravity With Multiple Compartments
Compartment count changes how the pack carries. Ice is the densest thing in it, so the insulated zone stays low and close to the back; putting it high makes the pack pull backward and increases shoulder moment. Keeping the loaded centre of gravity within roughly 50 mm to 80 mm of the spine is the target, and a partial load that slumps forward is worse than a full one.
- Insulated main compartment: 12 to 18 litres, welded liner, drain plug.
- Dry upper compartment: 6 to 10 litres, vapour barrier against the liner.
- Side pockets: sized for a 1 litre bottle with 10 mm of slack.
- Front organiser: utensils, opener, small dry goods, key clip.
- Harness: S-curve straps 50 mm to 65 mm wide, sternum strap, load lifters.
Harness geometry does the rest: S-curve straps in the 50 mm to 65 mm range spread the load, a sternum strap stabilises a shifting liquid load, and load lifters pull the top of the pack back toward the shoulders. The back panel still needs to breathe under a cold, damp liner, so a vented panel with a moisture barrier behind it is specified rather than a solid foam slab. Our production team prototypes compartment layouts in the 6 to 10 working day sampling window against a 500-piece minimum. Harness options are described under custom backpacks, and wall build-up in cooler bag insulation thickness.
Frequently Asked Questions (FAQs)
How should volume be split between the cooler and dry compartments?
On a 30 litre cooler backpack, allocate 12 to 18 litres to the insulated zone and 6 to 10 litres to the dry zone. That ratio keeps ice weight low and close to the back while leaving real space for food and clothing. Below 10 litres of insulated volume the pack stops being useful for a group of four.
What stops condensation wetting the dry compartment of a cooler backpack?
A vapour barrier of 0.10 mm to 0.15 mm film inside the divider panel, plus a full separation layer rather than a simple fabric divider. Without it, moisture forms on the cold liner and soaks whatever touches it. The barrier is checked by running the pack loaded with ice for 6 hours and inspecting the dry side.
How many compartments can a cooler backpack carry before the load shifts?
Five usable zones is the practical maximum. Beyond that, each pocket holds too little to be useful and the contents move independently, which makes a partially loaded pack feel unstable on the back. Three well-sized zones outsell five small ones in most retail programmes.
Where should the insulated compartment sit for stable carrying?
Low and close to the back, because ice is the densest load carried. Keeping the loaded centre of gravity within 50 mm to 80 mm of the spine stops the pack pulling backward and raising shoulder moment. A load that slumps forward when half empty is worse than a full one, so the insulated zone is shaped to hold ice in place.
Which seam method stops a cooler compartment leaking into the pack body?
Radio-frequency welded seams on a TPU-laminated liner, rather than stitched and taped seams. Needle holes at the floor corners are the usual leak origin, so the liner is welded and then pressure tested. A stitched liner can pass a visual check and still wick once melt water pools at the base.
How wide should a bottle pocket be to hold a 1 litre bottle securely?
Allow the bottle diameter plus about 10 mm of slack, so roughly 95 mm to 100 mm of flat width for a standard 1 litre bottle. Tight pockets overload the binding tape and tear within a season. Elastic binding of 20 mm holds pocket shape better than narrow 12 mm tape.
Which closure keeps an insulated compartment sealed when only half full?
A covered storm flap over a #8 coil zipper works best, since the flap takes the thermal path away from the chain. A roll-top closure is the alternative when the pack must also compress down. Both are tested half full, which is the condition where an unsupported zipper bows and leaks air.
How does compartment count affect the sampling timeline for a new design?
A two-compartment layout samples in 6 to 10 working days. Adding a welded liner, drain plug and vapour barrier pushes to the 12 to 15 day complex window, with bulk at 35 to 50 days. Compartment count rarely changes the minimum, which stays at 500 pieces per style and colour.
Further Reading and Internal Resources
Internal resources
- Request a quote (RFQ)
- Browse products & categories
- Factory capabilities & process
- Download RFQ template
- Download QC checklist
Related blog posts
- Custom Backpacks for Teams, Schools & Events
- Custom Bag Lead Times: Sample, Production & Shipping
- Custom Bag OEM: From Sketch to Store Shelf
- Custom Bag Production Scheduling: Avoid Delays
- Custom Business Backpacks for Professionals & Corporates
- Custom Clear Bags for Events, Stadiums & Schools
Next step
• Lock keyword and claim scope for custom cooler backpack oem
• Build a tech pack with BOM + tolerance map
• Choose materials route and validate tests (by spec)
• Plan sampling gates (lead time 6-10 working days)
• Set MOQ and cost targets (MOQ 500 pcs)
• Define QC plan and AQL checkpoints
• Confirm production + shipping timeline (35-50 days)

Ready to move on your next build?
Send over your requirements; a manufacturing plan and structured RFQ checklist are prepared for you.
Next guides: custom backpacks.
Zoning a Cooler Backpack: Volume, Temperature and Load Path
A cooler backpack with four pockets is not automatically better than one with two. Every divider adds seam length, labour and weight, and every opening breaches the insulation envelope, so the useful question is how much of the total volume should be insulated and where the thermal break sits. In practice the insulated zone should carry 45–60% of total volume for a day-pack format: enough for a full day of food and drink, not so much that the empty bag feels like a box. Below 40%, buyers complain that the bag is a backpack with a small cold pocket; above 65%, the dry-goods capacity disappears and the whole thing becomes single-purpose.
Separate the zones by function rather than by convenience. Cold and wet belongs in one welded or fully lined chamber with a drain path and no stitched-through seams at the floor. Dry and crushable belongs in an outer chamber that can be packed last and accessed without opening the cold zone, because every opening dumps the cold air and costs you roughly 15–25% of the remaining hold time on a warm day. Sharp or heavy items — cutlery, bottles, tools — need their own sleeves so they cannot abrade the liner from the inside.
| Zone | Share of volume | Construction note | Access |
|---|---|---|---|
| Insulated main chamber | 45–60% | Welded liner, 6–8 mm EPE, no floor stitch line | Top or full-face opening |
| Dry goods chamber | 20–30% | Unlined shell, mesh divider for visibility | Front panel zip |
| Bottle and utensil sleeves | 5–10% | Drop-in sleeves with a bound top edge | Side external |
| Quick-access pocket | 5–8% | Lined or unlined, key clip inside | Top lid or front slip |
Six Decisions That Decide Whether It Carries Well
Compartment count is also a cost decision. Each additional lined chamber adds a liner panel, a seam or weld pass and roughly 8–14% of sewing time on that unit, which is why a four-pocket build can sit USD 1.20–2.50 above a two-pocket build in the same shell fabric at the same quantity. Where the range needs a price ladder, the cleanest lever is the pocket specification rather than the shell: keep the fabric constant across the line-up and vary the internal architecture, so the visual family stays consistent and the tooling stays shared.
Development follows the standard path: 6–10 working days for a first prototype, 12–15 where a welded liner or moulded stiffener is involved, then 35–50 days of mass production after written approval. Prototype fees run USD 50–150 and are credited on the first bulk order; the quantity commitment is 500 units per style per colour, which can be discussed down to 300 once the pattern has completed a full bulk cycle.
If the programme is a backpack first and a cooler second, the load-path and strap geometry in custom backpack programmes should drive the chassis, and the volume tiers in the cooler bag size guide will help you pick where the SKU sits in the range.
Rather than repeat the same matrix here, keep the detailed grading with the central reference on material selection — it lists the acceptance numbers and sampling levels our team works to.