Tote Bag Logo Methods: Screen Print, Embroidery & Heat Transfer
Learn how to run a custom tote bag oem program for Global: materials, tech pack, sampling, QC and shipping. Get OEM/ODM-ready checklists and quote guidance.
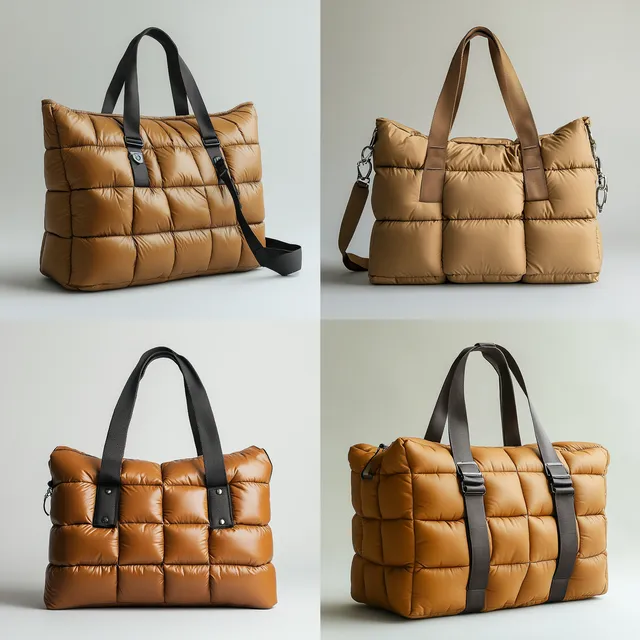
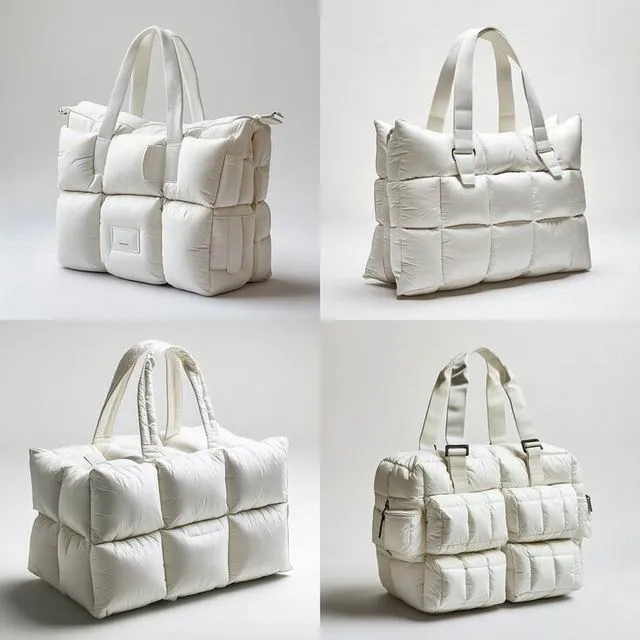
How a Tote Bag Actually Gets Made, Step by Step
A professional tote bag program is a controlled workflow: clarify requirements, lock the build route, validate with measurable gates, then scale production with repeatable QC.
Primary SEO focus: custom tote bag oem. Secondary: tote bag manufacturer, private label bags, custom logo bags, OEM ODM bags.
What the production team controls (process, not hype)
Condensed here by design — the extended comparison belongs to own-brand programmes, alongside the rest of the reference data.
A useful visit audits control points; it should never feel like a showroom tour.
Workflow on the production floor: step by step
- RFQ alignment: confirm claim scope, target cost, and packout rules before sampling.
- By spec, material sourcing locks the coating/laminate spec, fabric route and trim vendors.
- Pattern & measurement control: create templates, tolerance map, and reinforcement plan.
- Keep shade lots in order; verify marker efficiency and grain direction when cutting.
- Critical-zone reinforcement, then seam allowance and stitch spec, enforced at sewing or welding.
- Use placement jigs during final assembly to install hardware, logos and accessories.
- Inspection & packing: apply AQL sampling, carton marking, and shipping documents.
Typical buyer use scenarios
- retail
- grocery
- events
- corporate promotions
- trade shows
Key functions buyers request most
- reinforced handles
- wide opening
- internal pocket
- laminated finish option
- high-load stitching
Choosing the Best Materials for Custom Tote Bags
| Material | Performance | Cost Range | Best For | Pros & Cons | Risks & How to Control |
|---|---|---|---|---|---|
| canvas | Balanced durability (ISO 13934 tensile by spec); good abrasion (ISO 12947 by spec); stable for branding | US$1.6–5.5 / meter (by spec) | Core SKUs with predictable yield | Pros: versatile. Cons: performance depends on coating/finish | Lock coating spec, color tolerance and print compatibility; confirm reinforcement mapping |
| PU coated polyester (600D, by spec) | Good repellency (ISO 4920 / AATCC 22 by spec); moderate barrier (ISO 811 by spec) | US$1.2–6.0 / meter (by spec) | Value/core lines where print clarity matters | Pros: cost controlled. Cons: coating wear over time | Define spray rating targets and abrasion benchmarks; protect high-wear zones |
| Recycled RPET (route, by spec) | Sustainability positioning; performance depends on coating/laminate (ISO 4920 / ISO 811 by spec) | US$1.5–3.8 / meter (by spec) | Eco positioning programs and corporate procurement | Pros: sustainability narrative. Cons: supply stability and lot drift risks | Lock supplier lots, traceability and color delta; validate print and coating compatibility |
| Canvas / cotton (by spec) | Good hand-feel and print; waterproofing depends on finish (AATCC 22 by spec) | US$1.0–3.5 / meter (by spec) | Retail lifestyle lines, totes and promotions | Pros: classic look. Cons: heavier; stain risk without finish | Define shrinkage and colorfastness tests (AATCC 61 / ISO 105 by spec); specify lamination if needed |
How to shortlist materials fast
- Start from the scenario: abrasion zones, load points, and water exposure define the route.
- Main compartment only is one option; decide if the claim spans the whole bag or zones.
- Cite the ISO, AATCC or ASTM references in your pack and state what passes.
- Pick trims that suit the chosen route: zipper type, sliders, buckles and webbing strength.
- Print and branding compatibility is confirmed on the real fabric.
- Evaluate transit rubbing risk, because visible creases are freight damage far more often than stitching faults.
Custom Design & Development Process
What to include in a buyer-ready tech pack
OEM/ODM development flow (practical)
- Define target user, price band and positioning.
- Lock claim scope, then confirm the test plan to spec.
- To build it, add the BOM, then the measurement table, then the tolerance map, then artwork placement.
- Prototype sampling validates fit, structure and the material route.
- By PP, BOM and packaging route are final.
- First, sign the QC checklists and golden sample; only then cut bulk.
Sampling checklist (avoid costly mistakes)
What shortens the sampling loop
Repeatability beats one-off samples
Success example (anonymized): a premium program targeting Global reduced rework by freezing a single tech pack, running one pre-production sample using the final BOM, and aligning QC checkpoints before cutting. Reproducible builds remove the annual need to qualify someone new when reordering.
Production & Manufacturing Methods for Tote Bags
Ordering choices get clearer once you compare lead time, MOQ requirements and cost bands in the table.
| Production Type | Lead Time | MOQ | Cost Level | Leading For |
|---|---|---|---|---|
| Small-batch pilot run | 6-10 working days + 35-50 days | 500 pcs | medium | Startups, corporate gifting, SKU validation |
| Standard OEM mass production | 35-50 days | medium–high (per spec) | optimized | Retail replenishment and stable demand |
| New tooling / new input materials route | sampling + production per spec | as specified | premium | New silhouettes and claim-led innovation |
Manufacturing methods you should specify (by spec)
Custom Branding, Logo & Final Assembly
Logo methods we can support (select 1–2 per SKU)
Final assembly controls that prevent returns
Shipping, Logistics & Order Fulfillment
Logistics execution gates
Key Factors to Choose a Reliable Tote Bags Manufacturer
Use this checklist before signing an OEM/ODM contract for tote bags.
Manufacturer selection checklist
- Can they quote from a tech pack and explain assumptions?
- Can they source the BOM and also suggest alternatives that meet spec?
- Is there an AQL plan, and do QC checkpoints cover IQC through IPQC into FQC?
- Can workmanship survive a flexible MOQ arrangement?
- Can you expect firm lead times and a clear escalation procedure?
- Does their track record include packaging and shipping into your market?
Site audit checklist (what to check in person)
Capability summary
Printability starts with the substrate, not the artwork
Three decoration methods dominate tote programmes, and the correct choice is made on the substrate rather than on the design. Screen printing lays ink into the weave, so open-weave canvas accepts it readily while a closed laminated film needs corona treatment first. Embroidery adds thread above the surface, which requires enough yarn body to resist puckering and enough access room inside the panel for a backing. Heat transfer applies a PU film that sits on top, making it the only one of the three that reproduces small gradients cleanly on any reasonably smooth face.
Each has a different cost curve. Screen printing carries per-screen preparation inside the USD 300 to 2,500 tooling band for a full programme and then falls to a low per-unit cost, so it is the value leader above roughly 800 units. Embroidery prices from stitch count, which makes it economical for small crests and expensive for large fills. Heat transfer avoids screens entirely, so per-unit cost stays flat and high while remaining the cheapest route for a short, multi-colour pilot order.
Cost structure: screens, stitch counts and per-unit economics
Specifying each method numerically keeps quotes comparable. Screen printing on canvas uses a mesh of 110 to 160 threads per inch depending on ink viscosity, with plastisol cured around 150 to 160 degrees Celsius for three to five seconds per pass. Water-based inks give a softer hand on natural canvas but need longer dwell. Embroidery stitch counts typically run 3,000 to 12,000 stitches per placement, with cutaway backing required on anything stretch or lightweight and tearaway acceptable on heavy canvas.
| Method | Best substrate | Cost behaviour |
|---|---|---|
| Screen print | Canvas, nonwoven, laminated after treatment | Fixed screens, low unit cost above 800 pieces |
| Embroidery | 12 to 16 oz canvas, structured panels | Charged by stitch count per placement |
| Heat transfer | Smooth synthetics, laminated faces | No screens, flat unit cost at any volume |
| Woven label | Any, sewn into a seam | Small one-off loom charge |
| Sublimation | Polyester shell above 65 percent content | Best at full colour, chrome-free fastness |
Durability is then measured rather than asserted. Printed panels are washed five cycles at 40 degrees Celsius per ISO 6330, checked for crocking per AATCC 8 at grade 4 or better, and abraded per ISO 12947 where the print sits on a wear point. Embroidery is pulled at the backing and inspected for unravelling at the satin edge. Heat transfers are peel tested before and after washing, because delamination rather than fading is the typical failure.
Two practical constraints complete the decision. Print placement needs a 10 mm clearance from any seam or edge so the platen and later the sewing machine both have room, and colour matching should be agreed against a physical reference with a measured difference of Delta E 2.0 or less under D65 rather than against a screen proof. For logos destined for children's lines, ink must clear CPSIA and EN 71-3. Decoration durability testing is described further under custom bag quality certification, and finishing options appear alongside tote bag lamination.
Colour management: matching route, tolerance and what each extra colour costs
Colour is where decoration arguments start, because each method reaches a Pantone reference by a different route and therefore to a different tolerance. Screen printing mixes spot ink to the reference, so it holds a tight match on canvas but costs one screen and one press pass for every additional colour. Embroidery converts the reference to the nearest thread in a library, so the match is limited by what the yarn range contains. Heat transfer and sublimation build colour from CMYK, which handles gradients and photographs and gives up some spot accuracy.
The substrate changes the answer again. A reference mixed for cotton canvas reads differently on a recycled polyester face, because the base fabric shows through the ink film, and a pale ground shifts the perceived value of a mid-tone mark. Approve the match on the actual production fabric and under the lighting the retail channel uses, and record the tolerance as a number so bulk can be judged against it rather than against memory.
| Method | Colour route | Matching tolerance | Cost of each extra colour |
|---|---|---|---|
| Screen print | Spot Pantone mixing | Delta E 2.0 or tighter | One screen and one pass per colour |
| Embroidery | Thread library conversion | Nearest available shade | No added set-up, added stitch time |
| Heat transfer | CMYK plus spot white | Delta E 3.0 typical | No added plate |
| Woven label | Warp yarn library | Delta E 3.0 typical | Loom set-up charged once |
| Sublimation | CMYK only | Delta E 3.0 typical | None, but no metallic possible |
Metallic and reflective effects sit outside the normal rule. A metallic ink in screen print adheres poorly without a primer, metallic embroidery thread abrades faster than standard rayon, and a foil film on heat transfer is the most reliable of the three. Decide the effect before the method, because it narrows the choice immediately.
Five decoration faults and the check that catches each
Every one of these faults is visible on day one only if you know to look for it, and invisible until a customer complains if you do not.
- Registration drift on multi-colour screens. Hold print to plus or minus 3 mm against the placement template, measured from two fixed edges rather than from a drawing note, and allow plus or minus 5 mm on embroidery.
- Ink under-cure. Plastisol needs roughly 150 to 160 degrees Celsius per pass; under-cured ink looks correct and then cracks, which five cycles at 40 degrees Celsius under ISO 6330 will show.
- Puckering under embroidery. Anything below roughly 200 gsm needs cutaway backing, and stroke widths below about 4 mm fill in and lose the mark at arm length.
- Transfer delamination on laminated faces. Peel test before and after laundering, because a film on low-surface-energy fabric lifts at the edge first and then across the whole mark.
- Dye transfer onto light garments. Run AATCC 8 crocking at grade 4 or better in both wet and dry states, because transfer appears after a humid 25-35 day sea transit rather than on the packing table.
QUANZHOU JUNYUAN BAGS quotes any decoration route within 24-48 hours. Sampling runs 6-10 working days at USD 50-150 refundable against the order, plates and dies sit inside the USD 300-2,500 tooling band, bulk runs 35-50 days at MOQ 500, and release draws to AQL 2.5 under ISO 2859-1.
Frequently Asked Questions (FAQs)
Which logo method gives the lowest unit cost above 800 printed totes?
Screen printing. Preparation sits in the USD 300 to 2,500 tooling band, but per-unit cost then drops sharply, so it beats heat transfer above roughly 800 units and stays there. Below that volume, transfer film is usually cheaper because no screens are cut.
How is embroidery priced when quoted for a tote programme?
Embroidery prices from stitch count per placement, typically 3,000 to 12,000 stitches, plus backing choice. Cutaway backing is needed on lightweight panels and adds cost; tearaway suits 12 to 16 oz canvas. Large filled designs escalate quickly against small crests.
What wash durability standard should a printed tote panel be tested to?
Wash five cycles at 40 degrees Celsius per ISO 6330, then check colour transfer with AATCC 8 crocking at grade 4 or better. Add ISO 12947 abrasion where the print falls on a wear point, since fading is rarely the failure mode.
Why does a heat-transfer logo delaminate while the printed version survives?
Transfers fail at the adhesive rather than in the colour layer. Specify the correct film for the substrate, apply at roughly 150 to 160 degrees Celsius under 3 to 4 bar, then peel test before and after ISO 6330 washing to confirm the bond rather than the ink.
Can a full-colour gradient be reproduced on a canvas tote accurately?
Screen printing handles spot colours well but gradients poorly. Heat transfer reproduces fine detail cleanly on smooth faces, while sublimation suits polyester above 65 percent content and gives superior fastness. On heavy canvas, an embroidered crest often reads better, although minimum stroke width then decides how small that crest can realistically be.
How much clearance should a logo placement keep from seams or edges?
Keep at least 10 mm from any seam, fold or bound edge. Tighter placement makes the platen unstable during printing and gives the closing machine no room afterwards, which shows up as skew defects counted during AQL 2.5 inspection.
Which ink compliance rules apply when printing logos on children's tote bags?
Inks must clear CPSIA limits on lead and phthalates and EN 71-3 migration testing for EU placement. Request declarations from the ink supplier before sampling; switching ink suppliers after testing forces the whole compliance round to be repeated, so the ink set is fixed in the tech pack before sampling begins.
How long does a decorated tote take from artwork approval to bulk shipment?
Sampling after artwork lock takes 6 to 10 working days at USD 50 to 150 per decorated prototype, refundable against the order, then bulk production runs 35 to 50 days from approved pre-production sample at MOQ 500, quoted FOB Xiamen.
Related Blog Posts & Useful Resources
Internal resources
Related blog posts
- Custom Rolling Backpacks: Wheels & Handle Engineering
- Custom Rubber Patches & Metal Logos for Premium Bags
- Custom Messenger Bags for Business & Commute
- Custom Mini Backpacks for Kids & Promotions
- Custom Tool Bags with Adjustable Dividers
- Custom Tote Bags: Canvas, RPET, Cotton & Jute Compared
Next step
• Lock keyword and claim scope for custom tote bag oem
• Build a tech pack with BOM + tolerance map
• Choose materials route and validate tests (by spec)
• Plan sampling gates (lead time 6-10 working days)
• Set MOQ and cost targets (MOQ 500 pcs)
• Define QC plan and AQL checkpoints
• Confirm production + shipping timeline (25–35 days)
Want help with your next bag project?
Your requirements go in; a structured RFQ checklist and manufacturing plan come out.
Specifications in this category are normally verified against CPSIA (lead and phthalates), together with OEKO-TEX Standard 100 and ISO 2859-1 (AQL sampling) before a purchase order is released.
Related programme guides: custom tote bags.
Method selection changes the price, the hand and the lead time
Logo method is usually chosen from habit: print on canvas, embroidery on heavier fabric, whatever the last supplier did. It is worth ten minutes of deliberate thought, because the three main routes differ by a factor of three in unit cost, by weeks in calendar time at busy periods, and by a meaningful amount in how the finished bag feels in the hand and survives washing.
Screen printing remains the most economical option for flat colour work on canvas and non-woven substrates, particularly at 500 units and above where the screen and set-up charges amortise comfortably. It struggles with gradients and with small reversed-out detail, and it sits on the surface rather than in it, so a heavy print on a fold line will crack within a few months. Water-based discharge inks feel softer than plastisol and avoid the rubbery patch, although they are harder to match precisely against Pantone references on darker grounds.
Embroidery reads as premium and survives laundering better than any surface method, which is why it is the default on heavier cotton canvas and on leather-tabs for handbag-adjacent tote lines. The trade-offs are real, though: digitising fees, slower machine time, a visible reverse that needs covering with a backing, and limits on fine detail, since anything below about 4 mm stroke width fills in badly. Embroidery also distorts lightweight fabric, so it needs a cut-away stabiliser on anything under roughly 200 gsm.
| Factor | Screen print | Embroidery | Heat transfer |
|---|---|---|---|
| Set-up cost | Screens from USD 30 per colour | Digitising USD 60–120 | Film and plate USD 40–90 |
| Unit cost signal | Lowest at volume | Highest, about 3 to 5 times print | Mid, near print at 500 units |
| Colour capability | Spot colours, limited gradients | Thread library, no gradients | Full CMYK and gradients |
| Wash durability | AATCC 61 grade 3 to 4 typical | Excellent | Good with correct press parameters |
| Risk on coated or laminated fabric | Adhesion failure without primer | Perforates the barrier layer | Best option, low temperature film |
| Minimum detail | About 0.3 mm line | About 4 mm stroke | About 1 mm |
| Best use case | Flat brandmarks on canvas | Premium positioning, heavy substrates | Photographic art, small runs and laminates |
Placement, QC and how the decision lands on the schedule
Placement matters as much as method. Anything within 25 mm of a seam or a fold is at risk from both registration drift and mechanical cracking, and any logo crossing a handle anchor requires the reinforcement to be planned around it rather than stitched through it. Give the artwork as vector with Pantone references, state the placement as dimensions from two edges rather than as a drawing note, and allow ±3 mm registration tolerance on print and ±5 mm on embroidery so neither you nor the line is chasing an impossible standard.
Quality control should test the things that change with time rather than the things visible on day one. Wash fastness following ISO 6330 gives a realistic picture for a tote that will be laundered; crocking to AATCC 8 catches dye transfer onto light clothing; and an adhesion check after flexing catches prints that would otherwise appear fine on the packing table and fail after three uses. These take a week or more at an external lab, which is another reason to nominate them when you request a quotation rather than when you receive goods.
Rush approvals, where a visual is signed off without a physical strike-off, are the other common source of dispute, particularly on metallic or reflective films that read very differently under retail lighting than they do on a proof.Sustainability of the decoration itself deserves a mention for programmes with recycled or circular claims, since a polyester garment film on a recycled polyester shell complicates end-of-life separation and some programmes now specify a compatible TPU decoration for that reason. Ask for the relevant documentation at quotation, along with any OEKO-TEX Standard 100 certificate the decoration carries in its own right.
Commercially the picture is simple. Screen print set-up amortises quickly, so at 500 units per style it is usually the cheapest route; embroidery costs roughly three to five times as much per unit and is best justified where it supports the price point; heat transfer sits between them and is the only sensible choice on laminated or low-surface-energy fabrics where print adhesion is unreliable. Sample lead time for a decorated tote is 6 to 10 working days, extended to 12 to 15 where multiple placements or a special Pantone thread are involved. See how this fits the wider private label programme, and compare the price bands at cost and MOQ.
Numbers age badly when copied into dozens of places, so the maintained version of this grid stays on quality control and certification.
Rather than repeat the same matrix here, keep the detailed grading with the central reference on material selection — it lists the acceptance numbers and sampling levels our team works to.