Zipper And Hardware Selection For Custom Eva Bag
Learn how to run a custom custom bag oem program for North America: materials, tech pack, sampling, QC and shipping. Get OEM/ODM-ready checklists and quote
The Production Path a Custom Bag Follows
Process controls behind a repeatable build
Any tour worth taking is a control-point checklist in disguise, not a showroom trip.
Each stage, in the order it happens
- Get the brief straight first: claim, cost target and packing spec, then cut samples.
- Within material sourcing, lock by spec: coating/laminate spec, fabric route, trim vendors.
- Templates, tolerance bands and a reinforcement plan come next.
- Cutting stage: check grain direction plus marker efficiency; hold shade lots steady.
- Sewing and welding: hold the line on stitch spec, seam allowance, critical-zone reinforcement.
- At the final assembly stage, placement jigs position logos, hardware and accessories.
- Inspect to AQL, mark the cartons and raise the shipping documents.
Typical buyer use scenarios
- brand launches
- wholesale programs
- corporate procurement
- retail distribution
Key functions buyers request most
- custom sizing
- durable construction
- logo branding options
- retail-ready packaging
- consistent QC
Choosing the Best Materials for Custom Bags
| Material | Performance | Cost Range | Preferred For | Advantages & Watch-outs | Risks & How to Control |
|---|---|---|---|---|---|
| nylon | Even-handed wear resistance (ISO 13934 tensile per spec); good abrasion resistance (ISO 12947 per the specification); stable for branding | US$1.6–5.5 / meter (per spec) | Volume styles with predictable yield | Advantages: versatile. Limitations: performance depends on coating/finish | Lock coating spec, color tolerance and print compatibility; confirm reinforcement mapping |
| Recycled RPET (route, per spec) | Sustainability positioning; performance depends on coating/laminate (ISO 4920 / ISO 811 as specified) | US$1.5–3.8 / meter (to spec) | Eco positioning programs and corporate procurement | Merits: sustainability narrative. Limitations: supply stability and lot drift risks | Lock supplier lots, traceability and color delta; validate print and coating compatibility |
| Canvas / cotton (per spec) | Good hand-feel and print; waterproofing depends on finish (AATCC 22 per the specification) | US$1.0–3.5 / meter (to spec) | Retail lifestyle lines, totes and promotions | Advantages: classic look. Limitations: heavier; stain risk without finish | Define shrinkage and colorfastness tests (AATCC 61 / ISO 105 per the specification); specify lamination if needed |
Getting to two or three candidate fabrics
- Let the use case lead: abrasion, load paths and moisture pick the fabric for you.
- Decide whether the claim covers the whole bag or only zones like the main compartment.
- Every referenced ISO/AATCC/ASTM procedure should be listed, together with the numeric bar for approval.
- Choose route-suitable trims, from zipper type and sliders to buckles and webbing strength.
- Confirm that print and branding suit the specified fabric.
- Scuffing and creasing usually trace to transit, not to stitching defects.
Development Sequence for a Custom Build
Fields your tech pack cannot skip
Development steps in working order
- Set the buyer, the price bracket and the slot it fills.
- Confirm the claim scope and its test plan by spec.
- Artwork placement, tolerance map, measurement table and BOM: four pieces that make the tech pack.
- Fit, structure and material route get validated at prototype sampling.
- Final BOM, final packaging route: the PP stage.
- Sign-off requirement: QC checklists plus the reference sample, ahead of bulk cutting.
Sampling pitfalls and how to close them
- Confirm fabric shade and coating feel with the actual supplier lot (to spec).
- Review artwork location physically on paper before the selected print process runs.
- Confirm the zipper path, then slider feel, then the cycle requirement per spec.
- Three things need checking per lane: rub marks, folding lines, and defence against humidity.
- One PP sample, built with the final BOM and final packing route, is what needs approval.
Where sample rounds get saved
A programme that reorders cleanly
How the Order Is Actually Produced
Weigh MOQ requirements against turnaround duration and price tier using the options table.
Which method, and why it matters
For the complete spec grid — including the acceptance criteria and lot sizes — read tote bag specifications.
How the Mark Goes On, and What Closes the Bag
Branding options and where each fits
Assembly checks before the carton closes
Logistics and Fulfilment
Freight milestones to hold
How to Vet a Bag Production Route
Check every point here prior to signing your OEM/ODM bag contract.
Due diligence, item by item
- Can they work from a pack and tell you what they inferred?
- Are alternatives by spec offered, and BOM sourcing controlled by them?
- Do they evidence QC checkpoints, IQC to IPQC to FQC, and an AQL plan?
- Without hurting workmanship, can they allow a flexible MOQ?
- Can they give firm lead time commitments and a defined escalation path?
- Do they bring packaging and shipping know-how that fits your market?
Audit points to tick before you commit volume
Strengths worth weighing
Attaching Anything to a Closed-Cell Moulded Shell
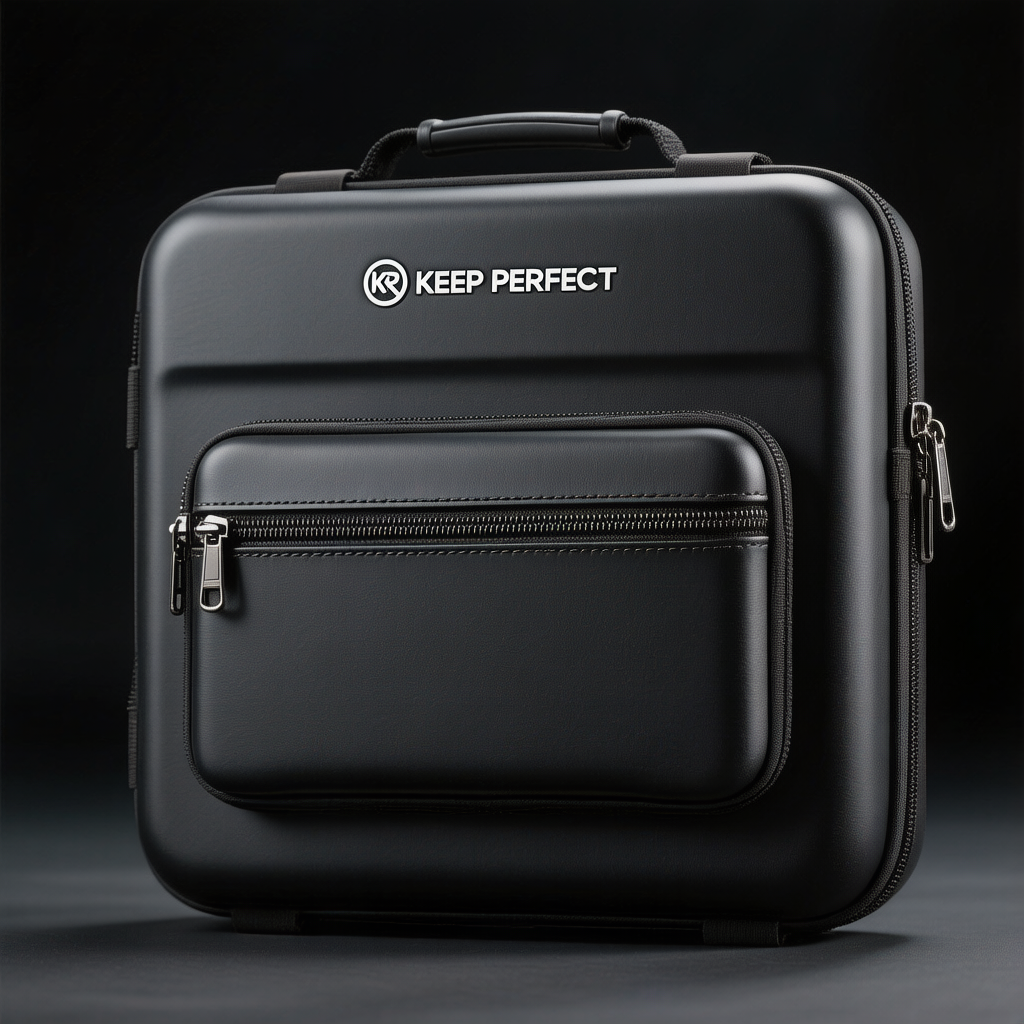
EVA shells - audio cases, drone cases, cosmetics cases, hard-shell lunch totes - are closed-cell foam pressed into shape. The material does not take thread well, and it will not hold a rivet or screw under repeated load without spreading. Every hardware decision on this category therefore comes down to how load is transferred into the shell, and to what spans that load.
Zippers are the first problem. A moulded edge cannot be sewn directly to a chain without tearing under load, because stitch tear propagates through closed-cell foam far faster than through woven fabric. Two workable answers exist: either the shell halves are joined by a textile gusset that has been laminated or welded to the EVA edge and then sewn to the chain, or the whole assembly is RF-welded where the shell carries a TPU facing.
Gusset-backed construction is the more flexible option. A knit backing around 180 gsm laminated to the EVA edge gives the stitch something to bite into, and the gusset width - usually 20 to 40 mm - sets how far the lid can open. Chain choice stays conservative: #5 covers small cases and #8 the larger ones, with reverse coil and PU-coated tape wherever the shell meets rain.
Rivets, Handles and the Pull-Through Problem
The second recurring failure in this category is hardware pulling through the wall. A D-ring or strap tab riveted straight through a 3 to 6 mm EVA wall will tear out within a few weeks ofloaded carry. The remedy is a washer plate - typically 1.5 mm PE or an equivalent moulded insert - spreading the load across 25 to 40 mm of wall, with acceptance measured above 150 N pull-out.
Handles follow the same logic. Where a moulded handle is drawn into the shell the wall thickness has to increase locally, otherwise the grip flexes and the wall eventually splits at the root. Strap tabs built into the moulding are stronger than ones riveted afterwards, but they commit the tooling early, which is worth doing while dies are still open.
Tolerances deserve attention before tooling is cut. Moulded halves rarely meet perfectly, so the drawing needs a stated mismatch allowance, usually 0.5 to 1 mm, or the seam reads as a visible step along the lid. Linings are either attached during forming or heat-set afterwards, and the second route allows late design changes at the cost of a manual operation whose adhesion has to be validated across every curve rather than only on flat panels.
Two environmental checks catch field issues before shipping. Heat behaviour matters because summer container interiors can exceed 60 degrees Celsius, which is enough to relax a lightly crosslinked shell and open a moulded corner. Abrasion on the knit backing is screened under ISO 12947, since the backing takes all the scuffing a case receives on a floor or a boot.
Bespoke dies for handle geometries and moulded inserts sit in the USD 300 to 2,500 tooling range, MOQ is 500 pieces and sampling takes 6 to 10 working days, extending to 12 to 15 for moulded shells. See how those assemblies are sequenced.
Frequently Asked Questions (FAQs)
Why do zippers tear out of moulded shells when they hold fine on fabric panels?
Closed-cell foam propagates stitch tear quickly, so a chain sewn straight into a moulded edge fails under modest load. The usual fix is joining the halves with a knit gusset of roughly 180 gsm laminated to the EVA edge, or RF-welding the assembly where the shell already carries a TPU facing.
Which zipper gauge and construction suit a hard-shell case opening?
#5 handles small cases and #8 larger ones, both normally in reverse coil with PU-coated tape so surface water sheds. Reverse coil also hides the teeth for a cleaner moulded appearance. Sliders are specified with rubber-coated pulls to stop rattling, since a hard shell amplifies sound against the chain.
How wide should the textile gusset be between two shell halves?
Between 20 and 40 mm is typical, and the width sets how far the lid can open rather than how strong the joint is. Wider gussets allow near-flat opening for packing but soften the silhouette, so the value is decided during sampling against the largest item the case has to accept.
What stops rivets and D-rings from pulling through an EVA wall?
A washer plate, usually 1.5 mm polyethylene or a moulded insert, spreads the load across 25 to 40 mm of wall. With that backing, pull-out acceptance is set above 150 N. Riveted directly into a 3 to 6 mm wall with nothing behind it, the same ring tears out within weeks of loaded carry.
How does heat inside a summer shipping container affect moulded cases?
Container interiors can exceed 60 degrees Celsius, enough to relax a lightly crosslinked shell and open a moulded corner permanently. Specifying higher crosslink density and checking dimensional stability at elevated temperature before booking avoids arriving deformed cases, which cannot be flattened back into shape.
How is the knit backing on a gusset tested for durability?
ISO 12947 abrasion, typically several thousand rubs before visible breakdown, screens how the backing survives scuffing on floors and boots. Because the backing also carries the stitch that holds the chain, any sign of breakdown is treated as structural rather than cosmetic during the inspection process.
Should handles be moulded into the shell or riveted on afterwards?
Moulded handles are stronger because there is no through-hole, but the local wall thickness must be increased or the grip flexes and cracks at the root. Riveted handles allow late changes and use cheaper tooling, at the cost of needing washer plates and periodic torque checks on the fixings.
What tooling and volume are needed for a custom hard-shell case?
MOQ is 500 pieces, which is also the point where a custom die or moulded insert priced between USD 300 and 2,500 amortises sensibly. Samples take 6 to 10 working days for sewn-gusset builds and 12 to 15 for moulded shells, with bulk occupying 35 to 50 days after approval.
Related Guides
Internal resources
Related blog posts
- Private Label Bags: How to Launch With an ODM Factory
- Pre-Production Samples: The Most Important Step in OEM Bags
- Recycled RPET Fabrics for Eco-Friendly Custom Bags
- REACH & RoHS Compliance for Custom Bag Materials
- OEM vs. ODM Bag Manufacturing: Which Is Right for Your Brand?
- OEM Bag MOQs Explained: How to Negotiate Minimum Orders
Next step
• Lock keyword and claim scope for custom custom bag oem
• Build a tech pack with BOM + tolerance map
• Choose materials route and validate tests (by spec)
• Plan sampling gates (lead time 6-10 working days)
• Set MOQ and cost targets (MOQ 500 pcs)
• Define QC plan and AQL checkpoints
• Confirm production + shipping timeline (35-50 days)
Start your next bag programme
Send over your requirements; a manufacturing plan and structured RFQ checklist are prepared for you.
Related programme guides: hardware and trim selection.
Zippers do not stitch into moulded EVA the way they stitch into fabric
An EVA shell behaves like a stiff foam, not like a textile. A needle through it does not just pierce it, it starts a tear that propagates along the stitch line under load. Everything about attaching a zipper or a D-ring to a moulded shell follows from that: the closure needs a flexible intermediary, and the hardware needs to spread its load over an area rather than a point.
Three attachment methods are in normal use. The first, and the most reliable, is a fabric gusset: a textile band is stitched to the zipper tape on a conventional machine, and the band is then welded or stitched to the shell, so the stitching happens in fabric and the join to EVA happens across a wide surface. The second is a welded flange, where a TPU-coated tape is RF-welded directly to an EVA that has been formulated to accept it; this gives the cleanest look and the best water resistance, but it depends on material compatibility and should be qualified by peel testing before it is committed. The third is mechanical — rivets, screws or moulded-in inserts — used where the part must be replaceable or where the load is high.
Wall thickness drives the choice. Thin-walled shells in the 3–5 mm range flex and will tear at any stitched penetration; thicker shells of 6–8 mm hold a rivet better but are heavy and slow to mould. Whatever the thickness, hardware should sit on a flat, reinforced area, and any hole should have a generous edge distance — keep at least 10 mm from the shell edge to the nearest penetration, more where the part takes load.
| Method | Suitable wall thickness | Typical strength | Best for | Main risk |
|---|---|---|---|---|
| Fabric gusset, stitched to zipper | 3–8 mm | Limited by gusset seam, ISO 13934-1 | Main openings, general cases | Bulk at the opening |
| RF-welded TPU flange | 4–8 mm | Peel strength of the weld | Water-resistant and clean-look builds | Material compatibility, drift in weld parameters |
| Rivet with backing washer | 5–8 mm | Pull-out resistance of the washer | D-rings, strap anchors | Cracking if edge distance is small |
| Moulded-in insert | 6–8 mm | Highest, load spread into the shell | High-load anchors, wheel plates | Tooling cost and cycle time |
| Screw into boss | 6–8 mm | Good, serviceable | Replaceable hardware | Stripping if over-torqued |
| Adhesive-bonded patch | 3–6 mm | Dependent on surface prep | Light trim, logo plates | Creep under sustained load |
Zipper selection follows the duty. Number 5 coil is the workhorse for a moulded case, number 8 where the opening is large or the contents are heavy, and a reverse coil where a flat outer face matters. If the product is sold on water resistance, a laminated waterproof coil is the right component, but it must be paired with a welded flange or a gusset that is itself sealed; a waterproof zipper sewn into a porous gusset delivers nothing. Add a garage at the slider end so the puller has somewhere to sit. Tolerance is the hidden cost of a moulded shell. A vacuum-formed or compression-moulded shell moves by a millimetre or two between cavities and between runs, while a zipper tape is dimensionally stable; if the pattern assumes perfect alignment, some percentage of units will close with the chain in tension and will fail early. Draft the opening with allowance for that movement, set a mould tolerance on the drawing — plus or minus 1.5 mm is a reasonable starting point for a formed shell — and inspect parts drawn from more than one cavity.
Hardware on an EVA case should be corrosion-resistant. Plated zinc parts screened to ASTM B117 for 24 hours are acceptable for general use, but the better choice on a case that will be carried outdoors is a quality moulded component from a house such as Duraflex. Where a metal look is required for positioning, anodised aluminium holds up better than decorative plating. For European sales, keep nickel-release evidence to EN 1811 in the file.
Testing a moulded shell before you commit the mould
Moulded parts fail in ways textiles do not: cold cracking, hinge fatigue and creep under sustained load. Test the shell at the low end of its intended temperature range — a drop or bend at 0 °C or below will find a formulation that is fine at room temperature — and run a hinge or flex cycle on any living hinge. Then test the assembly: a loaded drop onto the base and the corners, a static load on every strap anchor, and a cycle test on every closure.
Tooling for dies, welding jigs and cavity moulds is quoted separately and typically sits in the USD 300–2,500 band for straightforward work, with deep-draw shells requiring their own quotation. Sampling runs 6–10 working days for a fabric-and-hardware change and 12–15 where a new cavity or weld electrode is involved; mass production follows approval at 35–50 days. Programmes start at 500 units per style and colour, with repeat styles discussable from 300, quoted within 24–48 hours on T/T 30/70 terms.
Finished goods are sampled under ISO 2859-1 at AQL 2.5, and cartons for parcel channels are validated to ISTA 3A, because a corner drop cracks shells that no amount of seam engineering will save. Chemical compliance follows the destination: REACH (EC 1907/2006) for Europe, CPSIA and California Proposition 65 for the United States, and EN 71-3 where children are the end user. Small moulded cases in the same family appear under custom cosmetic bags, and substrate options are listed in custom bag materials.
Numbers age badly when copied into dozens of places, so the maintained version of this grid stays on quality control and certification.
Rather than repeat the same matrix here, keep the detailed grading with the central reference on material selection — it lists the acceptance numbers and sampling levels our team works to.