How to Print Logos on Cooler Bags Without Damaging Insulation
Compare how to run a custom cooler bag oem program for EU & US: materials, tech pack, sampling, QC and shipping. Get OEM/ODM-ready checklists and quote

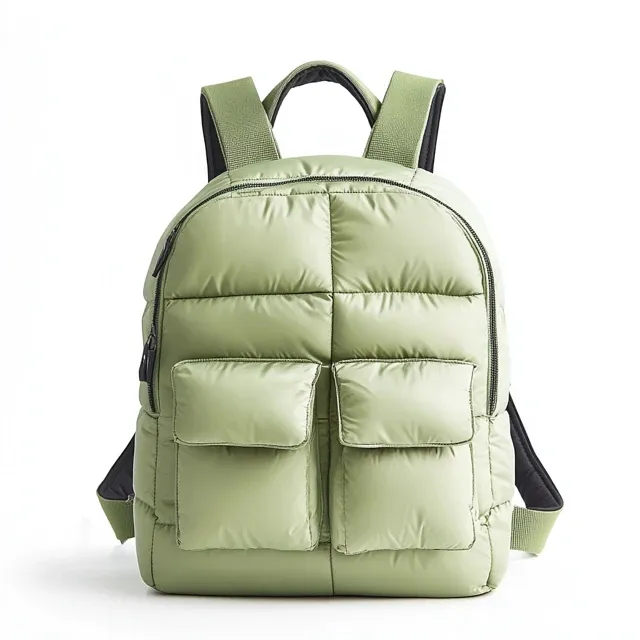
Where a Cooler Bag Gets Made, and How It Moves
The checkpoints that decide whether bulk runs
Any tour worth taking is a control-point checklist in disguise, not a showroom trip.
How the line handles your SKU
- Lock claim scope, price target and carton rules, and only then sample.
- Within material sourcing, lock by spec: coating/laminate spec, fabric route, trim vendors.
- Pattern work: cut templates, define tolerances, plan the stress-point build-up.
- Cutting stage: check grain direction plus marker efficiency; hold shade lots steady.
- Sewing and welding: hold the line on stitch spec, seam allowance, critical-zone reinforcement.
- At the final assembly stage, placement jigs position logos, hardware and accessories.
- Finish on AQL sampling, correct carton marking and complete documents.
Typical buyer use scenarios
- picnics
- camping
- food delivery
- beverage brands
- promotions
Key functions buyers request most
- thermal insulation
- leak-proof construction
- food-grade lining
- reinforced handles
- smooth zippers
Choosing the Best Materials for Custom Cooler Bags
| Material | Performance | Cost Range | Leading For | Advantages & Watch-outs | Risks & How to Control |
|---|---|---|---|---|---|
| 600D polyester | Steady wear life (ISO 13934 tensile to spec); good scuff resistance (ISO 12947 to spec); stable for branding | US$1.6–5.5 / meter (as specified) | Volume styles with predictable yield | Merits: versatile. Limitations: performance depends on coating/finish | Lock coating spec, color tolerance and print compatibility; confirm reinforcement mapping |
| PU coated polyester (600D, as specified) | Good repellency (ISO 4920 / AATCC 22 per spec); moderate barrier (ISO 811 per the specification) | US$1.2–6.0 / meter (per the specification) | Value/core lines where print clarity matters | Advantages: cost controlled. Limitations: coating wear over time | Define spray rating targets and abrasion resistance benchmarks; protect high-wear zones |
| Recycled RPET (route, per the specification) | Sustainability positioning; performance depends on coating/laminate (ISO 4920 / ISO 811 as specified) | US$1.5–3.8 / meter (per the specification) | Eco positioning programs and corporate procurement | Upsides: sustainability narrative. Watch-outs: supply stability and lot drift risks | Lock supplier lots, traceability and color delta; validate print and coating compatibility |
Triage the material decision
- Decide from the field conditions: rubbing, carrying load and water drive the choice.
- Decide whether the claim covers the whole bag or only zones like the main compartment.
- Every referenced ISO/AATCC/ASTM procedure should be listed, together with the numeric bar for approval.
- Choose route-suitable trims, from zipper type and sliders to buckles and webbing strength.
- Confirm that print and branding suit the specified fabric.
- Scuffing and creasing usually trace to transit, not to stitching defects.
Design, Sampling and Sign-Off
The specification sheet that avoids a second round
What happens first, second and third
- Write down the customer, the price tier and the role it plays.
- Confirm the claim scope and its test plan by spec.
- Artwork placement, tolerance map, measurement table and BOM: four pieces that make the tech pack.
- Fit, structure and material route get validated at prototype sampling.
- Final BOM, final packaging route: the PP stage.
- Sign-off requirement: QC checklists plus the reference sample, ahead of bulk cutting.
Getting the sample right first time
- Verify artwork location physically on paper before the selected print process runs.
- Load-test every anchor point: webbing, grab handles and D-ring areas, to specification.
- Review the zipper path, then slider feel, then the cycle requirement per spec.
- Three things need checking per lane: rub marks, folding lines, and defence against humidity.
- One PP sample, built with the final BOM and final packing route, is what needs approval.
- Lock all changes before bulk cutting; avoid late feature creep.
Reducing back-and-forth before bulk
From first build to annual reorder
Success example (anonymized): a value program targeting EU & US reduced rework by freezing a single tech pack, running one pre-production sample using the final BOM, and aligning QC checkpoints before cutting. A construction that can be duplicated means each season's reorder goes to the same partner.
Production & Manufacturing Methods for Cooler Bags
Weigh MOQ requirements against turnaround duration and price tier using the options table.
Methods and the numbers behind them
- Bonding / lamination requirements and peel strength targets (per spec)
- Stitch density and thread type for load zones (per spec)
- Fittings installation: jigs, torque control, and anti-loosening measures (to spec)
Branding Methods and Final Build Steps
Choosing how to apply your logo
Keeping returns down at the last station
- Branding mark alignment check against placement template
- Metal parts function check: buckles, sliders, and snaps
- Zipper end reinforcement and smoothness check
Shipping Mode, Cost and Timing
The export sequence, gate by gate
Key Factors to Choose a Reliable Cooler Bags Manufacturer
Use this checklist before signing an OEM/ODM contract for cooler bags.
What to ask before you place volume
- Do they price the pack and flag every assumption they made?
- Are alternatives by spec offered, and BOM sourcing controlled by them?
- Do they evidence QC checkpoints, IQC to IPQC to FQC, and an AQL plan?
- Without hurting workmanship, can they allow a flexible MOQ?
- Can they give firm lead time commitments and a defined escalation path?
- Do they bring packaging and shipping know-how that fits your market?
What an audit should look at, line by line
Full comparison table and line-by-line spec sheet: see travel bag specifications, which sets out tolerances, test methods and acceptance criteria used across programmes of this type.
Where the value sits
Heat Does Not Distinguish Between the Surface and the Core
An insulated bag is a laminated sandwich: face cloth on the outside, typically 300D or 600D polyester with a PU backing, then a foam insulating layer of around 4-8 mm of EPE or polyethylene, then an inner liner film such as PEVA or TPU laminate, sometimes backed with aluminium foil. A heat press applied to a finished assembly drives temperature through every layer, not only the printed one. EPE foam begins to soften below the temperature many curing processes require, and PEVA liners distort earlier still, so the visible symptom, a wavy or rippled inner wall, originates from something invisible on the exterior.
The damage is rarely obvious at press time. Foam cells collapse gradually under combined heat and pressure, so the bag passes unloading and only loses thickness after a few hours; by then, its thermal performance has quietly degraded. Adhesion failure follows the same pattern, because the adhesive holding face cloth to foam softens and later re-bonds unevenly, producing blisters between layers. That explains why the safe rule is simple: decorate before lamination, or use a method whose thermal load stays below the softening point of every layer below the print.
Methods That Keep the Core Intact
Screen printing on open, unlaminated panels is the most practical route, since the panel can take normal curing conditions and be laminated afterwards. Where the mark must go on a finished assembly, choose low-temperature options: cold-peel transfers applied at lower platen temperatures, sewn woven labels, or a stitched TPU patch. The last two are attached mechanically rather than thermally, which keeps heat away from foam entirely, and tooling for a custom patch runs USD 300-2,500.
| Method | Thermal load | Risk to insulation |
|---|---|---|
| Screen print on open panel | Normal cure before lamination | Minimal, panel is laminated afterwards |
| Cold-peel transfer on finished bag | Low platen temperature | Low, provided dwell is kept short |
| Stitched woven label or TPU patch | None, mechanical attachment | Very low, but stitching must avoid the liner |
| High-frequency welded patch | Localised, RF energy | Low on TPU liner films only |
Stitching deserves one specific caution. Embroidery and sewn patches introduce needles, and a needle path through the liner creates capillary paths that compromise leak containment. Restrict stitched decoration to outer panels and add a backing layer that stops the needle reaching the film, or attach labels during panel preparation rather than after closing. Where the liner itself must be marked, use a film-safe print bonded to the liner before assembly.
Verification should then prove nothing degraded. Run AATCC 127 water resistance on the finished face fabric, check coating and laminate bonding to ASTM D751, and confirm seam strength with ASTM D5034 on load-bearing joints. Thermal validation belongs alongside, with ice retention testing under controlled ambient conditions before and after decoration changes. Our team also reviews wall stack-ups, similar to the principles in our materials reference.
Finally, confirm that the liner still satisfies food contact documentation, since any ink or adhesive migrating toward the cavity needs REACH (EC 1907/2006) and, for the United States, FDA alignment. Sampling takes 6-10 working days, 12-15 working days for complex wall structures, minimum order is 500 units, and bulk production runs 35-50 days.
Frequently Asked Questions (FAQs)
At what temperature does the insulating foam inside a cooler wall begin to deform?
EPE foam begins softening well below the curing range that many print processes demand, often under 100 degrees Celsius, which is why a finished wall ripples even when the exterior looks acceptable. Keep every thermal exposure below that softening point, or print the open panel before lamination and assemble afterwards.
Can we heat press directly onto a finished insulated bag without ruining it?
Direct pressing risks foam collapse and adhesive failure, both appearing hours later rather than immediately. Where the bag is already closed, prefer cold-peel transfer at reduced platen temperature, a stitched label or a sewn TPU patch, since patch tooling runs USD 300-2,500 and needs no heat at all.
Which decoration method keeps the inner liner leak resistant?
Mechanical attachment wins: a stitched woven label or sewn TPU patch introduces no heat and, if backed correctly, no needle path into the liner. Where a print is mandatory on the liner itself, apply it during panel preparation and verify integrity with AATCC 127 afterwards.
Does embroidery puncture or weaken the liner enough to cause leaking?
Needle paths through a film liner become capillary routes for meltwater, so drips appear later rather than at inspection. Restrict embroidery to outer panels, add a barrier behind the stitch area, and require that any liner seam be bound or welded, verified with AATCC 127 before release.
How thick should insulation be to protect a cooling claim during decoration?
Most soft coolers use around 4-8 mm of EPE foam. Thicker walls tolerate more heat but add bulk and cost; thinner walls deform faster under a press. Whichever you specify, re-validate ice retention after decoration, because press heat changes the effective thickness even when the exterior looks unchanged.
Which tests confirm that decoration did not damage the wall laminate?
Ask for ASTM D751 coating adhesion and bonding behaviour on the face cloth, AATCC 127 water resistance on the outside surface, and ASTM D5034 seam strength on load-bearing joints. Add an ice retention comparison against the undecorated control so any thermal loss is measured, not assumed.
How much does a sewn TPU patch cost relative to direct printing?
Moulded TPU patches carry tooling of USD 300-2,500, amortised across the order, plus stitching labour per unit. Direct printing is cheaper per unit but limits where the mark can sit. Minimum order is 500 units, and sampling takes 6-10 or 12-15 working days depending on structure.
What compliance checks apply to liners and prints near the food cavity?
Liner films need REACH (EC 1907/2006) declarations, with FDA alignment for the United States market, and any ink or adhesive close to the cavity should be declared. Add EN 71-3 and CPSIA where users are children, then confirm bulk production timings of 35-50 days still fit your plan.
Next Steps and Further Guides
Internal resources
Related blog posts
- Custom Backpacks for Teams, Schools & Events
- Custom Bag Lead Times: Sample, Production & Shipping
- Custom Backpacks for Corporate Gifting & Merchandise
- Custom Backpacks for Gym, Sports & Fitness Brands
- Custom Business Backpacks for Professionals & Corporates
- Custom Clear Bags for Events, Stadiums & Schools
Next step
• Lock keyword and claim scope for custom cooler bag oem
• Build a tech pack with BOM + tolerance map
• Choose materials route and validate tests (by spec)
• Plan sampling gates (lead time 6-10 working days)
• Set MOQ and cost targets (MOQ 500 pcs)
• Define QC plan and AQL checkpoints
• Confirm production + shipping timeline (35-50 days)

Let's scope your next order
Send over your requirements; a manufacturing plan and structured RFQ checklist are prepared for you.
Next guides: custom backpacks.
Every Logo Process Is a Heat and Pressure Event
Cooler bags fail in a way other soft goods do not: the cavity that does the work is a closed cell foam sandwich, and almost every decoration method you might choose involves pressing something hot against it under load.
Understand the stack before choosing the method. A typical build runs outer shell, a mid layer of polyethylene or EPE foam somewhere between 4 and 8 mm, and an inner liner of PEVA or aluminium foil laminate. The foam contributes loft, and loft is what keeps the cold in. When heat is conducted through the outer skin faster than the foam can dissipate it, cells collapse locally; the panel may look flat rather than noticeably damaged, yet the section loses a measurable share of its insulating value. The same event can soften the adhesive holding the liner laminate, giving the classic delamination bubble that appears weeks later in the field rather than on the inspection table.
The safest construction sequence is to decorate before assembly wherever the artwork geometry allows. Printing flat panels on a platen before they are bonded to foam removes the thermal path entirely, and it is how we normally propose to run any design that sits within panel margins. Where decoration must be applied to a finished bag — particularly over a side panel adjacent to a liner — the press parameters have to be treated as part of the specification: temperature ceiling, dwell time, release film, and a documented cool-down before the next stage.
| Method | Exposure | Risk to insulation | Control we recommend |
|---|---|---|---|
| Screen print on cut panels | Cure oven, no direct foam contact | Very low | Default route; decorate before bonding |
| Heat transfer on finished bag | High temperature plus pressure | Foam compression, liner delamination | Low-temperature film, release sheet, time and temperature logged |
| Direct embroidery | Needle penetration, no heat | Perforates the liner, leaks and moisture migration | Avoid through the liner; use a separate patch panel |
| Woven or printed label sewn on | Needle penetration only | Stitch line becomes a leak path | Bind rather than stitch through; seal the stitch line |
| Silicone or rubber badge | Heat press or adhesive | Adhesive creep, local compression | Cool-cycle adhesive, shortened dwell |
| Sublimation on shell panels | Sustained high heat | Coating damage, print-through to liner | Pre-assembly only, on polyester shell |
Verifying That the Logo Did Not Cost You Hours of Retention
The only credible proof is a comparative retention run. Test the printed version and the undecorated control from the same production batch in the same chamber at the same time, because a result taken from an earlier run tells you nothing about the unit in front of you. If the printed sample loses hours against the control, you have a process problem, not a style problem, and fixing it before bulk is the difference between a specification change and a recall.
Two further checks belong in any insulated bag protocol. Water resistance of the liner fabric is measured as a hydrostatic head per AATCC 127 with the threshold stated in millimetres, and coating adhesion of the laminate is assessed per ASTM D751 so that a bonded layer is verified rather than assumed. Since liners come into direct contact with food and ice melt, the material should also carry a food-contact declaration consistent with FDA 21 CFR, which is a documentation check you should request at material approval rather than at inspection.
Set a numeric tolerance for how much performance you are prepared to trade for the artwork. A workable rule is that the decorated unit must fall within a stated number of hours of the undecorated control; anything wider is a process problem, not a style characteristic. Write that threshold into the tech pack and apply it at pre-production as well as per lot, because the alternative is discovering after launch that every unit carrying your branding performs worse than the samples used to sell the range.
Placement deserves its own rule. Keep artwork off fold lines, corner radii and the base crease where the bag collapses for storage, because those zones flex repeatedly in service and any deposit laid over them will craze. Embroidery should never penetrate the liner at all: apart from the leak path, thread wicks moisture into the foam layer where it cannot dry, which produces odour complaints months later. Indicative FOB Xiamen pricing for this category sits at USD 5.50 to 12.00 on a 500-unit basis, labelled indicative only, so a process change that saves pennies is rarely worth trading against hours of retention. The measurement protocol itself is set out in factory-standard ice retention testing, and our documentation expectations are listed under quality and certification.
Numbers age badly when copied into dozens of places, so the maintained version of this grid stays on quality control and certification.
Rather than repeat the same matrix here, keep the detailed grading with the central reference on material selection — it lists the acceptance numbers and sampling levels our team works to.